
Student guide
These are questions that have cropped up before, and can hopefully solve your query
Student Guide to Using Noteable for Assignments
Accessing assignments
First ensure that you have accessed Noteable through the correct course. If you go into Noteable from the wrong link, you may not have access to the right assignments. Choose the Standard Notebook (unless advised otherwise by the course organiser) and press Start.
Fetching an assignment
Once in Noteable, go to the Assignments item in the Formgrader menu. The assignment will appear in the Released assignments section. Press Fetch in order to get the assignment onto your launch page (download assignment to home directory). It will move to the Downloaded assignments section on the Assignments page.
The following image shows what you see before and after fetching an assignment in the Assignments tab:
- The assignment 2024-10-31 15:10 is available to be fetched
- The assignment Assignment test1 has been fetched and is available to be worked on.

Opening and Completing the assignment
There are two ways to access the notebook documents for a given assignment: access through the Assignments tab or open them through the File Browser in the left panel.
Using the Assignments tab
Having fetched the assignmemt (as above), you could work on it immediately - just stay in the Assignments tab in the interface.
In the image below, notice that Assignment test1 has been "opened" and the notebook document python_squares_assignment (demo) is shown:

If you click on the notebook document name, it will open it for you to work on
Using the File Browser
In your files directory, there is now a folder for your course (look for a folder named after the course code). The folder will contain all of the assignments for this course. You can now access the assignment by clicking on the relevant folder. You can open and edit the contents of the notebook from this folder.
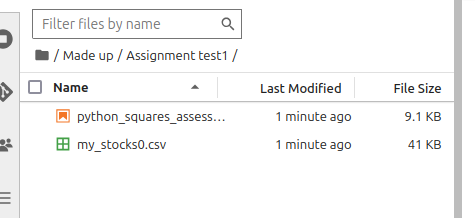
Note that viewing a folder shows all the files, not just any notebook documents.
Completing the assignment
An assignment notebook document is essentially like any other notebook document: you may open it, work on it, save it, close it, come back to it and carry on... as much as you need. The difference is that this notebook document will likely come with places for you to will in your own code, and possibly some tests to check that code is doing the right thing.
Within the notebook, there will be three kinds of cells. You will not be able to (and shouldn't need to) edit read-only cells as these will most likely hold the instructions and explanations for the exercises. You add your code inside answer cells (either manually or autograded depending on the type of question). Each cell that requires an answer will be indicated by:
# YOUR CODE HERE
raise NotImplementedError()
The third cell type you could encounter is the autograder test cell. This will include code such as assert that tests if the code you created works correctly. If all answers are manually graded, there won't be any test cells in the notebook.
Once you've finished working on the assignment, click Save, then Close and Halt in the File tab within the notebook.
Submitting your assignment
Make sure you did not change the name of the assignment or the names of any of the notebooks, folders and files within the assignment folder
- If you change the name of one of the notebooks, it will not get recognised for marking.
- If you replace one of the notebooks with a different file, it will also not be able to be marked.
- If you change the name of the assignment folder, you won't be able to submit it at all.
Go back to the Assignments tab and click on the name of the assignment.
- You can choose Validate each notebook document - to check you passed any available tests (this will not submit the assignment) or
- Submit the complete assignment.

Your teacher might not include any autograder test cells, which would be visible to you as a cell containing code such as assert, then validating the assignment will be successful on default. If running the notebook generates an error in these test cells, a pop-up window points you toward the error and the Validate button turns red. If the notebook runs without any issues, the Validate button turns green.
Once you are happy with your assignment, click Submit. In case you change something after submission, you can resubmit the assignment through Noteable, although discuss with your teacher if they allow multiple submissions.
Please note: if you change the name of a file, it will not be graded.
Accessing feedback for your assignment
Your instructors may choose to add feedback, and return it to you.

If feedback is available for your assignments, there will be a note next to the submission-time for each assignment under the Submitted assignments tab (as the assignment 2024-10-31 15:10 shows.)
Fetch it by clicking on Fetch Feedback.
If the feedback has already been released, a link will appear next to the time of submission labelled view feedback. This will take you to a page with a rendition of your notebook with individual grades and any feedback included:
